Not all quests are created equal in SMT:SJR. Some are crucial for further gameplay despite seeming to be unimportant. Some can help you get money or unique items. And some of them are just light-hearted entertainment and comedy relief. I decided to gather information about all Ex-Missions into one page to help those who are stuck while completing Shin Megami Tensei: Strange Journey Redux Ex-Missions.
To provide more context and priority, I added my personal notes on top of basic quest info. I also list item descriptions and the names of unlocked Sub-Apps, so you can decide whether it’s worth the trouble.
That’s all I could find in-game or online. If I missed some details, please comment below or contact me. One day I might even do the full maps…
⚠️ Notes
- Every time you beat a new special demon, you unlock its fusion. Consider this an additional reward
- Numbered and other grouped Ex-Missions are to be completed one after another
- You can copy a quest’s direct link under the description
Ex-Missions with Solutions
The Little Injured Faerie
- Location: Antlia B1F
- Client: Pixie
- Solution: Give Pixie a Bead
- Reward: Pixie Knife (2×2-4, Charm)
This storyline is something of a tutorial for both Ex-Missions and demon fusion. Pixie is your first ally among demons, as you might recall. You can accumulate the required demons during the course of your walkthrough and hand them over in one sitting later in the game. However, Pixie’s forma rewards unlock a few extremely useful sub-apps, and the demons she asks for are pretty decent to use for yourself.
Faerie Land Establishment I
- Location: Antlia 1F
- Client: High Pixie
- Solution: Give Pixie a Goblin (fused or recruited)
- Reward: Sleeping Stone forma
- Unlocks: Enemy Lullaby sub-app (lowers encounter rate)
- Precondition: Unlock B
Faerie Land Establishment II
- Location: Antlia 1F
- Client: High Pixie
- Solution: Give Pixie a Silky
- Reward: Fragrant Stone forma
- Unlocks: Enemy Challenge sub-app (increases encounter rate, great for grinding and farming)
- Precondition: Sector Delphinus access
Faerie Land Establishment III
- Location: Antlia 1F
- Client: High Pixie
- Solution: Give Pixie a Pyro Jack and a Jack Frost
- Reward: Soothing Stone forma
- Unlocks: Medic sub-app (lowers effect of damage tiles)
- Precondition: Sector Eridanus access
Faerie Land Establishment IV
- Location: Antlia 1F
- Client: High Pixie
- Solution: Give Pixie a Spriggan and a Vivian
- Reward: Answerer Knife (71×1)
- Precondition: Sector Fornax access
Faerie Land Establishment V
- Location: Antlia 1F
- Client: High Pixie
- Solution: Give Pixie an Oberon and a Titania
- Reward: Criticker knife (39×2, Poison)
- Unlocks: Access to faerie village where you can:
- Shift your alignment by talking to Goblin (priceless!)
- Obtain Faerie Armor (107, null: Curse, st: Wind, weak: Elec, +10HP) from Oberon
- Precondition: Sector Grus access
Sandman’s Backup Bag
- Location: Antlia B2F
- Client: Sandman
- Solution: Talk to any Sandman during battle and return
- Reward: Chakra Pot (restores some MP to 1 ally)
- Note: The reward is a joke, I feel like this one is a tutorial for using restoring items and communicating with demons (which, to me, shows the unparalleled flexibility of SMT communication system – one of my favorite features). Plus some comedy relief.
Blue Jet Reclamation
- Location: Antlia 1F
- Client: Crew
- Solution: Beat Lorelei at Blue Jet location
- Reward: Fairy’s Harp forma
- Unlocks: MP Recover II sub-app (small MP recovery with every moon phase)
Melchom’s Task
Here’s another chain of Ex-Missions. Since Melchom is a paymaster demon, he gives you a chance to earn up to 59,000 macca by exploring different restoring items.
Melchom’s Task I
- Location: Bootes 1F
- Client: Melchom
- Solution: Give Melchom 2 Chakra Drops
- Reward: 4000 macca
Melchom’s Task II
- Location: Bootes 1F
- Client: Melchom
- Solution: Give Melchom 2 Chakra Pots
- Reward: 15000
- Precondition: Sector Delphinus access
Melchom’s Task III
- Location: Bootes 1F
- Client: Melchom
- Solution: Give Melchom a Great Chakra
- Reward: 40000 macca and Melchom Ring (+20MP, void: Strain)
- Precondition: Sector Fornax access
The Maddness of Yggdrasil
- Location: Bootes 1F
- Client: Dis
- Solution: Automatic
- Reward: Yggdrasil Ring (+15HP, null: Poison)
- Note: It’s a no-brainer. Free stuff with automatic completion. Do it. This is more of a storytelling device that helps you learn some bits of Norse mythology.
Fateful Aid
- Location: Eridanus top
- Client: Norn
- Solution: Defeat Yggdrasil
- Reward: Nornir Ring (+1 all stats)
- Precondition: Completion of previous quest, Gate Search C
Long Nose in the Air
- Location: Bootes 1F
- Client: Karasu Tengu
- Solution:
- Get Tengu’s Box by talking to any Koppa Tengu in Antlia B1F
- Return to client and get his apology letter
- Go back to Antlia and talk to Koppa Tengu again
- Reward: 3000 macca
- Note: Entertainment quest and a chance to get to know the reoccurring demons of SMT series.
That Unforgettable Taste
- Location: Bootes 3F
- Client: Hariti during full moon
- Solution: Use Enemy Search to find Persephone in Bootes 5F and get a Pomegranate from her
- Reward: Rasetsu Vest (22, null: Dark)
A Sport for Gentlemen
- Location: Bootes 8F
- Client: Halphas
- Solution: Get at least 8 (max 9) UMA Tissues by fighting Mamedanuki during a single moon cycle
- Reward: UMA’s Ball forma
- Unlocks: UMA Converter sub-app (Beast fusion results are converted to UMA)
- Note: This might take a few attempts to figure out, but it’s a fun minigame. Once you accept Halphas’ challenge, Mamedanuki will appear in fixed locations. If you don’t make it in time, go to Halphas to start again.
Escape Plan
- Location: Bootes 1F
- Client: Crew
- Solution: Lead lost crew members through the maze
- Reward: Death Omen forma
- Unlocks: Fiend Converter sub-app (Genma fusion results are converted to Fiend), Fiends can be located with Enemy Search
- Precondition: Gate Search A, completed Emergency Signal Inquiry main mission
Death Distilled
- Location: Bootes 1F
- Client: Dionysus
- Solution: Talk to a Zhen in Delphinus and get Zhen’s Feather
- Reward: Amrita Soda
The Snowman’s Revenge
- Location: Carina BF1
- Client: Jack Frost
- Solution: Give Jack Frost an Ice Vest (DF Carite + 3 UMA Muzzle + 4 Enigma Clay @ lab)
- Reward: Frost Cannon gun (55×1)
- Unlocks: Frost Ace fusion
Forge! Forge!! Forge!!!
A series of Ex-Mission by the weird Dwarf that occupied the room where you first met Mastema. Just as the quest above, this feels like a tutorial for Forma Search and lab development which are introduced in the game at this point.
Forge! Forge!! Forge!!! I
- Location: Carina F1
- Client: Dwarf
- Solution: Give Dwarf a Cursed Lance (AT Antlite II + 2 Raptor Tissue + 4 Jirae Dress @ lab) and 2 AT Carite II
- Reward: Hawthorn Spear (67×1). Dwarf will need some time to forge it, walk around and he will send you a notification when it’s ready.
- Precondition: Horkos’ first attack and escape to 4F
- Note: The required forma is dropped by various enemies after battles on different floors of Antlia as indicated by Antlite forma name.
Forge! Forge!! Forge!!! II
- Location: Carina F1
- Client: Dwarf
- Solution: Give Dwarf a Nihil (2 AT Carite II + 6 Genma Spear + 5 Enigma Clay @ lab) and 3 Anubis Stones
- Reward: Cursed Sarai sword (82×1, Charm).
- Precondition: Search Type A, sector Eridanus access
- Note: The required forma is dropped by various enemies after battles on different floors of Carina as indicated by Carite forma name.
Forge! Forge!! Forge!!! III
- Location: Carina F1
- Client: Dwarf
- Solution: Give Dwarf a Murakumo Clone (3 AT Grusite II + 8 Wood Sceptre + 8 Genma Bugle @ lab) and 2 Onogoro Stones
- Reward: Amenomurakumo sword (127×1)
- Note: Grusite obviously comes from Grus, and Onogoro Stones can be obtained in Horologium
A Formal Search Request
- Location: Carina F4
- Client: Goblin
- Solution:
- Find Orthus via Enemy Search near the entrance in Bootes 1F and talk to him
- Go to Antlia B2 and talk to Scathach in the room where you fought Morax
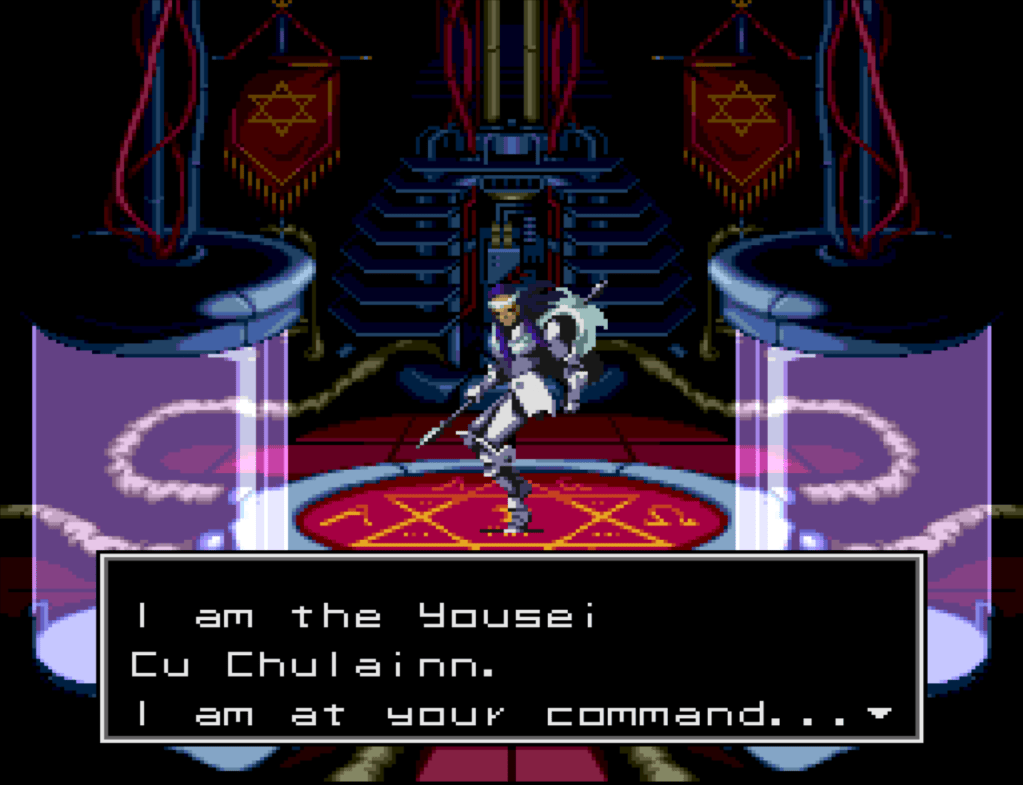
- Use Enemy Search just by the exit from Antlia F1 to find Cu Chulainn
- Reward:
- Gae Bolg spear (23×3, random)
- Knight’s Oath that contains Cu Chulainn password
- Unlocks: Cu Chulainn fusion
- Precondition: Gate Search B
- Note: Cu Chulainn is another reoccuring SMT character from Irish lore. He is a solid ally in every title, so get to know him if you enjoy the series.
These two are requests from mutual enemies. So you can choose whether you want to be on light or dark of this Slavic vendetta. Or both! You will also be able to watch the battle. Spoiler: defense is higher on the light side’s reward, but resistance on the dark side is more specific.
Hawthorn Spear Needed
- Location: Delphinus 1F
- Client: Kresnik
- Solution: Give client a Hawthorn Spear (as in Forge! Forge!! Forge!!! I; 2 AT Eridite II + 9 Genma Jar + 8 Spirit Acid @ lab)
- Reward: Belobog Vest (65, st: Phys)
- Note: This quest shifts your alignment towards Law
Find a Sickle Called Pest Crop
- Location: Delphinus 1F
- Client: Kudlak
- Solution: Give client a Pest Crop (2 AT Delphite II + 4 Spirit Stalk + 8 Enigma Himorogi @ lab)
- Reward: Chernobog Vest (62, st: Curse)
- Note: This quest shifts your alignment towards Chaos
The Shadow Withdraws
- Location: Delphinus 4F
- Client: Crew
- Solution: Talk to crew members about McClane and then fight him
- Reward: Abba Dingo gun (40, all, Wind)
- Precondition: Gate Search B
The Wise Man’s Library
Thoth’s quests are riddles which reference actual in-game demons from different sectors. They teach you to look closely at encountered demons and Compendium entries. You can try to solve them yourself, since you can recall some familiar features, but thinking of all these is a serious pain for a person like me (I hate riddles with a passion). Nevertheless, in the end you can get an incredible custom password demon which can be utilized to beat optional bosses in New Game+ super annoying final dungeon. Continue at your own discretion.
The Wise Man’s Library I
- Location: Erudanus 1F
- Client: Thoth
- Solution: Talk to a Poltergeist in Antlia
- Reward: Odin Passage (text file, a part of the password)
- Note: See why I’m not a fan? Everyone was all about poltergeists and the likes in 80s and 90s, but now it feels dated. I’d rather go straight to more timeless Compendium dwellers like Atropos.
The Wise Man’s Library II
- Location: Erudanus 1F
- Client: Thoth
- Solution: Talk to a Bifrons in Bootes
- Reward: Tyr Passage (text file, a part of the password)
The Wise Man’s Library III
- Location: Erudanus 1F
- Client: Thoth
- Solution: Talk to an Atropos in Fornax
- Reward: Thor Passage (text file, a part of the password)
The Wise Man’s Library IV
- Location: Erudanus 1F
- Client: Thoth
- Solution: Talk to a Melchom in Antlia, negotiate, but assure him that you don’t need anything from him
- Reward: Frey Passage (text file, a part of the password)
The Wise Man’s Library V
- Location: Erudanus 1F
- Client: Thoth
- Solution: Talk to a Vivian in Eridanus and a Surt in Horologium
- Reward:
- Moon Passage (text file, a part of the password)
- Divine Sword (128×1)
The combination of acquired passages gets you the password to a custom Seth with Agidyne, Bufudyne, Ziodyne, Garudyne and Concentrate which can be copied below:
SUNMONTUESWEDNESTHURSFRISATURDAY
I don’t think using the password without doing the quests is bad, because you will need to have TONS of money to even summon the demon anyway.
Marebito, the Foreign God
- Location: Eridanus 2F
- Client: Ame no Uzume
- Solution:
- Get mirror from Futotama in Fornax 1F
- Talk to Kinmamon in Eridanus 2F
- Reward: Sound Jewel forma
- Unlocks: Gate Search E
Before the Holy Battle
There are two symmetrical areas in Eridanus 3F where you can find representatives of Law and Chaos factions. You can participate in Ex-Missions on both sides, but their completion shifts your alignment and the last mission of a series is only unlocked if your alignment corresponds to the faction. The first round of missions grants you forma for multiple sub-apps, and after that you get alignment-specific equipment. If you have a decently filled Compendium and some money, you can fuse necessary demons on the spot and complete the quests one after another.
Before the Holy Battle I
- Location: Eridanus 3F
- Client: Kazfiel
- Solution: Defeat Kazfiel (weak to electric) with a party of demons with less that 60 Magic combined
- Reward: Paper Sheet forma
- Unlocks:
- Orpheus sub-app (chance of demon gaining +1 Magic on level-up)
- Achilles sub-app (chance of demon gaining +1 Agility on level-up)
- Theseus sub-app (chance of demon gaining +1 Luck on level-up)
- Note: This quest shifts your alignment towards Law
Before the Holy Battle II
- Location: Eridanus 3F
- Client: Aniel
- Solution: Defeat Aniel (weak to wind) within 7 turns
- Reward: Plasma Sword (26×2-4, Law only)
- Precondition: Gate Search C
- Note: This quest shifts your alignment towards Law
Before the Holy Battle III
- Location: Eridanus 3F
- Client: Kazfiel and Aniel
- Solution: Defeat Kazfiel (weak to electric) and Aniel (weak to wind) using demons with average level less that 45
- Reward: Cleric Robes (60, drain: Elec, resist: Wind, weak: Curse)
- Precondition: Unlock C
- Note: This quest shifts your alignment towards Law
The Holy Dragonslayer
- Location: Eridanus 3F
- Client: Kazfiel and Aniel
- Solution: Defeat Mother Harlot (weak to wind)
- Reward: Amanomi Sword (130×1, Law only)
- Precondition: Law alignment
The Ever-Steeper Trial
Note: This chain of Ex-Missions shifts your alignment (see the section above).
The Ever-Steeper Trial I
- Location: Eridanus 3F
- Client: Zouchouten
- Solution: Defeat Zouchouten (weak to ice) with demons that don’t have any healing or restoring skills
- Reward: Abacus forma
- Unlocks:
- Double Down sub-app (high chance of demons changing skills on level-up)
- Hercules sub-app (chance of demon gaining +1 Strength on level-up)
- Orion sub-app (chance of demon gaining +1 Vitality on level-up)
- Note: This quest shifts your alignment towards Chaos
The Ever-Steeper Trial II
- Location: Eridanus 3F
- Client: Koumokuten
- Solution: Defeat Koumokuten (weak to wind) with MP reduced to 1
- Reward: Vajra sword (54×1-2, Chaos only)
- Precondition: Gate Search C
- Note: This quest shifts your alignment towards Chaos
The Ever-Steeper Trial III
- Location: Eridanus 3F
- Client: Jikokuten
- Solution: Defeat Jikokuten (weak to electric) with demons that have less than 300 HP
- Reward: Monarch Vest (110, resist: Gun, weak: Expel)
- Precondition: Unlock C
- Note: This quest shifts your alignment towards Chaos
The Ever-Steeper Trial IV
- Location: Eridanus 3F
- Client: Bishanonten
- Solution: Defeat Bishanonten with demons that have less that 150 level combined
- Reward: Kurikara Blade (58×1-4, Chaos only)
- Precondition: Chaos alignment
Can You Find My Beloved Horse?
- Location: Eridanus 2F
- Client: Odin
- Solution: Give Odin a Slepnir
- Reward: Odin Ring (your Demonica regains MP when you walk)
Tales Of Investigation
- Location: Eridanus top
- Client: Dantalian
- Solution: Fully map Bootes 1F, Carina 2F and Delphinus 3F by stepping on every tile, Sanctum not included
- Reward: Bookmark forma
- Unlocks: MP Regen II sub-app (restores some MP to whole party with every moon phase shift)
- Precondition: Gate Search C
- Note: You can continue working for Dantalian after completing the main Ex-Mission to earn up to 253000 macca for different maps. If you are a completionist, just map out everything you can at least in the first few sectors on NewGame+, so you can instantly get the rewards when you meet him.
Fool Eat Meat!
- Location: Eridanus 2F
- Client: Cerberus
- Solution:
- Talk to an Orthrus in Eridanus
- Come back to Cerberus
- Talk to an Oni in Antlia
- Come back to Cerberus again
- Talk to Orthrus once more
- Pay the final visit to Cerberus
- Reward: Dauntless Ring (null: Paralysis)
- Precondition: Gate Search E
- Note: As you can see, that’s a lot of pain. But even the name suggests that this quest is an entertaining piece of storytelling with many dialogs. Also, you will get a chance to use your high-level Forma Search and Enemy Search in Antlia.
Catch the Rabbit!
- Location: Fornax BF1
- Client: Alice
- Solution: Somewhat similar to A Sport for Gentlemen – you need to chase the Hare of Inaba in less than a moon cycle. Passers-by can drop some hints about the hare’s location.
- Reward: Hexagram forma
- Unlocks: Forma Search C
- Note: Go for it. The quest allows you to upgrade the main app, though it totally looks like a secondary “just for fun” mission. Alice is the creepy reoccurring character of the series, who is always in the center of some hot mess.
The Mother Goddess’ Gravestone
- Location: Grus Sanctum A
- Client: Crew
- Solution: Defeat Alilat
- Reward: Nabatea Stone forms
- Unlocks: Columbus sub-app (maps out all tiles within your search radius, as if you stepped on them)
- Precondition: New Game+, completed Jack’s Squad Pacification main mission, Unlock E
- Note: A mission that is clearly tailored to NG+. Columbus sub-app can save you a lot of trouble in the sadistic final dungeons of new Neutral ending, but it’s not an essential
False God in Chains
- Location: Grus
- Client: Metatron
- Solution: Defeat Demiurge in Grus
- Reward: Chakra Elixir (restores a little MP, can be indefinitely reused), Demiurge might join you if you are Law-aligned
- Precondition: Enemy Search C, previous mission completion
- Note:
- Do it during Full or New Moon phase with greatly reduced difficulty
- Elixir sounds way better than it really is. At the stages of walkthrough when you are able to get it, it can only restore a tiny bit of MP that’s not enough to cast even one solid spell. Not worth wasting a turn, so it only makes sense between battles, but even then it’s cumbersome 😐 On the other hand, it’s a kind of tutorial for your new Enemy Search C app and a way to unlock Demiurge fusion.
Mara’s Desire
- Location: Grus Sanctum B / Maya’s lair
- Client: Mara through Grendel
- Solution: Talk to Grendel if you haven’t killed him, otherwise go straight to former Maya’s lair and talk to Mara. Defeat Seraph in Horologium B6F
- Reward: Peacemaker gun (130×1, Almighty and Ice rounds, Chaos only), Mara might join you
- Precondition: Chaos route, defeat Gore
Evil’s Lingering Shadow
- Location: Grus Sanctum A / Horologium B6F
- Client: Seraph through Archangel
- Solution: Defeat Mara in Grus 1F
- Reward: Megido Fire gun (74×1, Almighty and Flame rounds, Law only), Seraph might join you
- Precondition: Law route, defeat Gore
A Measure of Forever
- Location: Grus Sanctum A / Horologium B6F
- Client: Barong
- Solution: Talk to a Rangda in Horologium
- Reward: Great Chakra
Killing Time I
- Location: Deck
- Client: Dent
- Solution: 1, 5, 9, 13, 17, 21, 25, 29
- Reward: 1000 macca
- Precondition: Access to Bootes
Killing Time II
- Location: Deck
- Client: Dent
- Solution: Rules are explained by Dent
- Reward: 2500 macca
- Precondition: Access to Delphinus
Black Box Retrieval
These are interesting not just because of fusion-altering sub-apps as rewards, you also get to read the last thoughts of your deceased crew mates about the environment of various Schwarzwelt sectors.
Black Box Retrieval I
- Location: Deck
- Client: Gekko through Dent
- Solution: Pick up black boxes of the dead crewmen in Antlia B2, Bootes 7F, Carina 1F, Delphinus 2F
- Reward: Omen Bug sub-app (warns you about traps)
- Precondition: Access to Carina
Black Box Retrieval II
- Location: Deck
- Client: Gekko through Dent
- Solution: Pick up black boxes of the dead crewmen in Eridanus 1F, Fornax B2F, Grus 1F, Horologium B2F
- Reward: Copernicus sub-app (raises fusion accident rate to 100%)
- Precondition: Access to Delphinus
Lurker of the Toilets
- Location: Deck
- Client: Dent
- Solution: Defeat Kanbari
- Reward: Secret Records forma
- Unlocks: Copernicus sub-app (Deity fusion results are converted into Enigma)
- Precondition: Access to Carina
Here is a sequence of requests from Anthony, your crew mate, regarding his demon crushes and the lack of reciprocity from their side. This is a classic japanese comedy relief trope, but you also get stat boosting incenses just by talking to demons. It’s somewhat similar to The Wise Man’s Library series since you have to solve riddles and be attentive to demons’ features.
The Enchanting Spirit
- Location: Deck
- Client: Anthony through Dent
- Solution: Talk to Leanan Sidhe in Bootes
- Reward: 2 Ma Incense
- Precondition: Access to Delphinus
To See Her Again…
- Location: Deck
- Client: Anthony through Dent
- Solution: Talk to Moh Shuvuu in Carina
- Reward: 2 Ag Incense
The Cool Beauty
- Location: Deck
- Client: Anthony through Dent
- Solution: Talk to Yuki Jyorou in Delphinus
- Reward: 2 Lu Incense
Dream Lover
- Location: Deck
- Client: Anthony through Dent
- Solution: Talk to Lilim in Bootes
- Reward: 2 Vi Incense
Waving Her Back Goodbye
- Location: Deck
- Client: Anthony through Dent
- Solution: Talk to Skogsra in Delphinus
- Reward: 2 St Incense
The Camel-Mounted Noblewoman
- Location: Deck
- Client: Anthony through Dent
- Solution: Talk to Gemori in Grus
- Reward: 2 Lu Incense and a password to custom Gemori
Password, which is an esoteric Kabbalistic reference* and also the spell used in SMT I to initiate the whole demon situation, can be copied below:
ELELOHIMELOHOELOHIMSEBAOTH-AMEN
* If you are curious about this stuff, watch Aronofsky’s “Pi” or read the good old Foucault’s Pendulum.
These are the boss rush machines in New Game+.
Mysterious Device
- Location: Antlia 1F
- Client: A weird-looking AI-pillar
- Solution: Beat a sequence of bosses
- Reward: Depends on your progress. Not much more than you would get in normal fight, whether it’s good or bad
- Precondition: New Game +
Mysterious Device II
- Location: Womb of Grief, The Ingress
- Client: A weird-looking AI-pillar
- Solution: Beat a sequence of Redux-exclusive bosses
- Reward: Depends on your progress
- Precondition: New Game +
Womb of Grief Ex-Missions
I hate to type the gross name in big font, but I didn’t come up with a substitute title for the section 😐
New Ending Main Missions
They are technically Ex-Missions, but overall they work the same way as main mission (though the feeling is very different, which I like). Fruits are WoG equivalent of Exotic Matter, and beating a Sphere’s boss gives you full access to the next Sphere and quest.
You need to clear all the floors in Womb of Grief to get the new ending and learn Alex’s side of the story. The mission is automatically accepted when you are saved by Demeter after Alex beats you up in Bootes.
| Name | Location | Target |
|---|---|---|
| Obtaining the First Fruit | First Sphere | Anahita |
| Obtaining the Second Fruit | Second Sphere | Ishtar |
| Obtaining the Third Fruit | Third Sphere | Alex |
| Obtaining the Fourth Fruit | Fourth Sphere | Forneus, Alex |
| Obtaining the Fifth Fruit | Fifth Sphere | Zeus |
| Obtaining the Sixth Fruit | Six Sphere | Maria |
Demonee-ho Boot Camp
Ex-Missions by Demonee-ho are a combination of hilarious references to Full Metal Jacket, Atlus mascot, battle challenges similar to Before the Holy Battle/The Ever-Steeper Trial and WoG map exploration since you should chase Demonee-ho in different locations across all floors. The rewards include incense and really useful battle-related sub-apps.
As of now I don’t have the maps, but here are a couple tips regarding Demonee-ho’s locations:
- Demonee-ho likes 1-tile dead ends
- Forma won’t spawn on quest locations, so if your your Forma Search shows an icon in a dead end, you don’t have to visit it
- If you are going for the new ending, you can combine the two quest sequences to double the rewards. It’s easier that returning to these mind-numbing dungeons having forgotten how warp mazes work
Demonee-ho Boot Camp I
- Location: The Ingress
- Client: Demonee-ho
- Solution: Defeat 3 Slimes without demons having healing skills, not using items and changing demon lineup
- Reward: Stink Bag forma
- Unlocks: Enemy Banish sub-app (prevents low-level enemies encounters)
Demonee-ho Boot Camp II
- Location: First Sphere
- Client: Demonee-ho
- Solution: Defeat Ares using demons with less than 15 Vitality, not using items and changing demon lineup
- Reward: 2 Vi Incense
Demonee-ho Boot Camp III
- Location: Second Sphere
- Client: Demonee-ho
- Solution: Defeat Thoth and Seiten Taisei in 3 turns with all party MP reduced to 10, not using items and changing demon lineup
- Reward: Liquid Medicine forma
- Unlocks: God Hand sub-app (Auto Commander Skill, heals an ally’s ailments except KO)
Demonee-ho Boot Camp IV
- Location: Third Sphere
- Client: Demonee-ho
- Solution: Defeat Fuu-Ki, Kin-Ki and Sui-Ki in 7 turns using demons without Almighty skills, not using items and changing demon lineup
- Reward: 2 St Incense
Demonee-ho Boot Camp V
- Location: Fourth Sphere
- Client: Demonee-ho
- Solution: Defeat Azrael using demons with total Magic less 70, not using items and changing demon lineup
- Reward: Fairy Horn forma
- Unlocks: Promotion sub-app (Auto Commander Skill, increases party Attack, Defense and Agility)
Demonee-ho Boot Camp VI
- Location: Fifth Sphere
- Client: Demonee-ho
- Solution: Defeat Demonee-ho and his Demonicas using demons with party’s total level less than 180, not using items and changing demon lineup
- Reward: 2 Lu Incense
Demonee-ho Boot Camp VII
- Location: Sixth Sphere
- Client: Demonee-ho
- Solution: Defeat Zaou-Gongen
- Reward: Diploma forma
- Unlocks: Spearhead sub-app (Commander Skill, party’s attacks ignore enemies’ special resistances for one turn)
- Note: Little rascal Demonee-ho turns out to be Zaou-Gongen and it’s beautiful
Wardens of the Womb of Grief
- Location: Fourth Sphere
- Client: Demeter, automatic
- Solution: Defeat Isis, Volvo, Cybele, Anat and Kali using Enemy Search
- Reward: Gun Booster Ring (boosts Gun skills)
Finding Loki’s Ally I
- Location: Sixth Sphere
- Client: Loki
- Solution: Give Loki a Vritra
- Reward: 50000 macca
Finding Loki’s Ally II
- Location: Sixth Sphere
- Client: Loki
- Solution: Give Loki a Mada
- Reward: Levitating Stone forma
- Unlocks: Doctor Magus sub-app (prevents damage from trap tiles)
Mothers at Dusk
- Location: Sixth Sphere
- Client: Lilith
- Solution: Find the vase in Third Sphere Sanctum B via Forma Search
- Reward: 5 Ma Incense
Empyrean Ascent Ex-Mission
Offerings from Louisa Ferre
- Location: Lower Layer
- Client: Louisa Ferre
- Solution: Clear the floor to activate 4 switches which will give you access to optional bosses: Beelzebub, Lucifuge, Belial and Nebiros
- Reward: Morningstar Px forma
- Unlocks: Magellan sub-app (shows full dungeon map with minor exceptions)
Support This Website

Cast Bless
If my original content is any help to you, kindly consider donating a few coins. It will keep the website going! There’s more to come. Cost: ✨3 spell points
$3.00

